In addition to blogging, I'm also using Twitter. Follow me @matthawley
Previously, Jeremy Skinner posted a very thorough guide on setting up Mercurial in IIS. The difference between his guide, and what I'll be walking you through, is how Mercurial is hosted in IIS. Where he shows you using a CGI script that executes python.exe, my guide will show you how to use isapi-wsgi to host Mercurial. The biggest benefits of using isapi-wsgi over executing python.exe, is the raw processing speed and the overall throughput your server can handle.
Note: This post uses Mercurial 1.5.1, Python 2.6.5 although it should work for all older/future versions released.
Packages Installation
Install Python
The reason you need to install Python first, is that all subsequent installations will install directly into the Python installation (in the Lib\site-packages folder), including Mercurial. It is important to note that you will need to install the version of Python that Mercurial was built against, as well as installing the x86 version (yes, even if you're on a x64 platform). Download and install Python 2.6.5.
Install PyWin32
This component is needed to run certain win32 functions (specifically for ISAPI) that isapi-wsgi needs. Download and install this package, letting it determine the default installation path for you.
Install Mercurial Source
Normally, you would download the binary package for Mercurial, but for this process to work, you will need to utilize the source code package. Download the mercurial-1.5.1.win32-py2.6.exe package and install it. Just as PyWin32, let it determine the default installation path for you.
Install isapi-wsgi
This is the glue that binds everything together. It's used to build a shim based on a python script that you setup (later). Download and install this package, also letting it determine the default installation path for you.
Get hgwebdir_wsgi
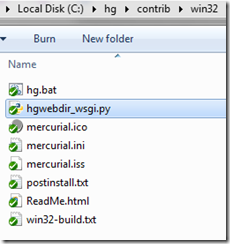
You will now need to download the python script hgwebdir_wsgi.py. This is the script that you will configure to and execute to build the ISAPI shim DLL. This script is apart of the Mercurial source code, and is not distributed with the binaries or the earlier installation. To get it, you can download the source code from the Mercurial site, or clone their repository by executing the following command
hg clone http://selenic.com/repo/hg#stable
Once you have the source, you can find the script in the contrib/win32 directory.
Configuration
Note: The following steps assume that you already have IIS installed. If you do not, please refer to Jeremy's guide for these steps.
1. Create a folder that will be used by the IIS website for hosting your Mercurial installation. For example, C:\inetpub\hg
2. Copy hgwebdir_wsgi.py to the location created in step 1
3. Open hgwebdir_wsgi.py in a text editor, and configure the following settings
hgweb_config = r'c:\inetpub\hg\hgweb.config'
path_prefix = 0
4. Open a command prompt changing your directory to c:\inetpub\hg
5. Execute python hgwebdir_wsgi.py which will generate a DLL shim called _hgwebdir_wsgi.dll
6. Create your hgweb.config file with the following content
[paths]
/ = c:\repos\*
7. In IIS Manager, create a new application pool called "Mercurial" and ensure that the "Enable 32-bit Applications" is set to true.

8. Create a new website pointing it to the location in step 1.
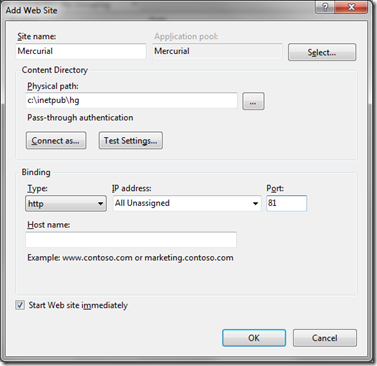
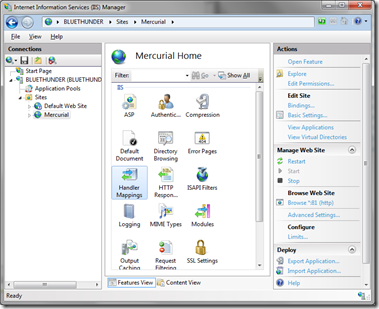
9. Open up the Handler Mappings for your new web site.
10. Add a new "Wildcard Script Map" with the Executable location pointing to the Shim DLL created in step 5. Give it the name Mercurial-ISAPI.
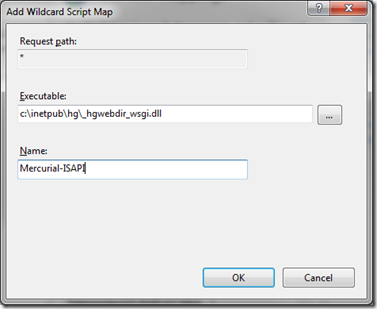
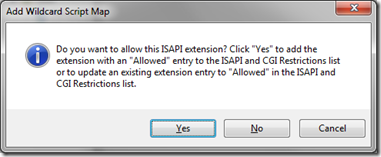
11. Click the OK button, and when it prompts you to allow this ISAPI extension, click "Yes".
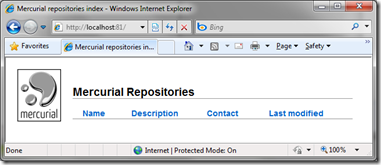
12. Now, browse to your newly created website, and you should see hgwebdir being served.
13. Now, run the following command to create a new empty repository, and then refresh your browser.
hg init c:\repos\test
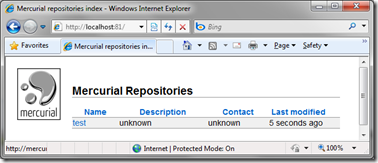
All Setup!
At this point, your Mercurial server is setup. You'll also notice that there's no need for URL rewriting unlike the the CGI approach. You can start pulling / pushing changes to your repository. While this setup requires more steps and dependencies, the benefit is that you are running completely within IIS gaining it's benefits of application isolation, memory management, and improved performance.
e94a547a-337b-4d0d-bf51-87ef247ed647|5|4.4